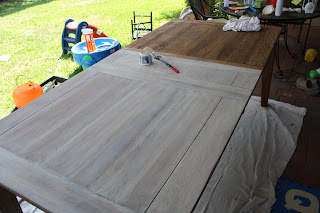
How come projects that seem so easy to do never turn out to be THAT easy! ha! My dining room table was suppose to be an easy project, remember?! Well after several different attempts of "white-washing" using different colors I finally figured it out! I discovered that it did not look good no matter what color color I used to white wash the table.
I started out with a gray mixture (I mixed a darker gray with white and some water), that only turn the table "blue-ish." I tried a light gray mixture (lots of white and a little bit of gray), better but still "blue-ish." I tried straight white (and water) that was too white. I realized I would need to remove the stain and start from there. So I sanded the stain off the top of the table(one side). I tried white-washing it again on the side where I removed the stain. Once again it looked too blue and too white. I realized that I was not trying to get the table to look gray, I really wanted it to look washed tan with a little gray. SO I started again! This time I mix a light tan/cream with a little white and some water. Once I painted that on the side without the stain I was in love but it was still missing a little bit of the "it" factor. I realized I needed to actually stain the table before white-washing it. I tried two different stains that I had on hand and then white washed it. The stain that worked was Mission Oak Satin.
Since I knew what worked I was about the finally start. I sanded (and resanded) the top of the table removing all the stain (and test paints). Since the legs and the sides were slimmer it was a bit more tedious to sand those so I used a spray stripper. After stripping and sanding the whole table down I was then about to start re-staining it!
The Table BEFORE
Testing out colors and sanding...
Lovely Blue legs...
See... still blue-ish even without the stain. I think white-washing with gray is hard since gray has a blue base.
AH! Finally "Naked!" This is what the table looked like once I removed all the original stain.
Half stained with the new stain... (Mission Oak Satin)
When staining I did it in VERY small sections. I painted
on the stain and then wiped it off with a clean rag. I wanted the wood
to pick up some color but not soak in all the stain to get a deep/rich color. Once the stain dried I began "white-washing."
When I white-washed (or tan-washed) I also did it in small sections. I painted on the color, then painted over it with water and then wiped it all off using a clean rag. (I used a regular white and "Pebble.") I wiped it off in the direction of the wood grain. I started with the table top and then moved on to the legs and sides.
You can see the difference of the
"tan-washed" side vs the stained side.
I don't have more pictures of the next process but I still felt there was something missing on the top once I finished. I decided to "stain" the table top on-top of the "white-washed" look. I used a charcoal stain because it had a gray tone and the charcoal stain doesn't tend to drastically change the paint color. When I did this, I again worked in small sections. I painted the stain on and then quickly wiped it off with a clean-dry rag. I only did this to the table top and not to the sides or the legs. You can't tell a major difference, which was my goal. Adding the stain to the top I think it added some extra detail to the wood grains.
The last thing I did was seal it with a satin finish water-based polyurethane.
The AFTER
I really love how it turn out!! Even if it took MUCH longer than I thought it would!
The new color with the old chairs. That is the next step!
Getting new chairs or painting them... hummm
(Ignore the window with the missing curtain panel! It was at the dry cleaners!)
What do you think?? I think this will work until I get my dream farm table!! :)
I want to try this again on a few more things I have laying around that need a new facelift. Once I figured out how to do it, it was a lot of fun!


